Day 21: Setting Up Git Repository on Storage Server - Version Control Foundation 🗂️
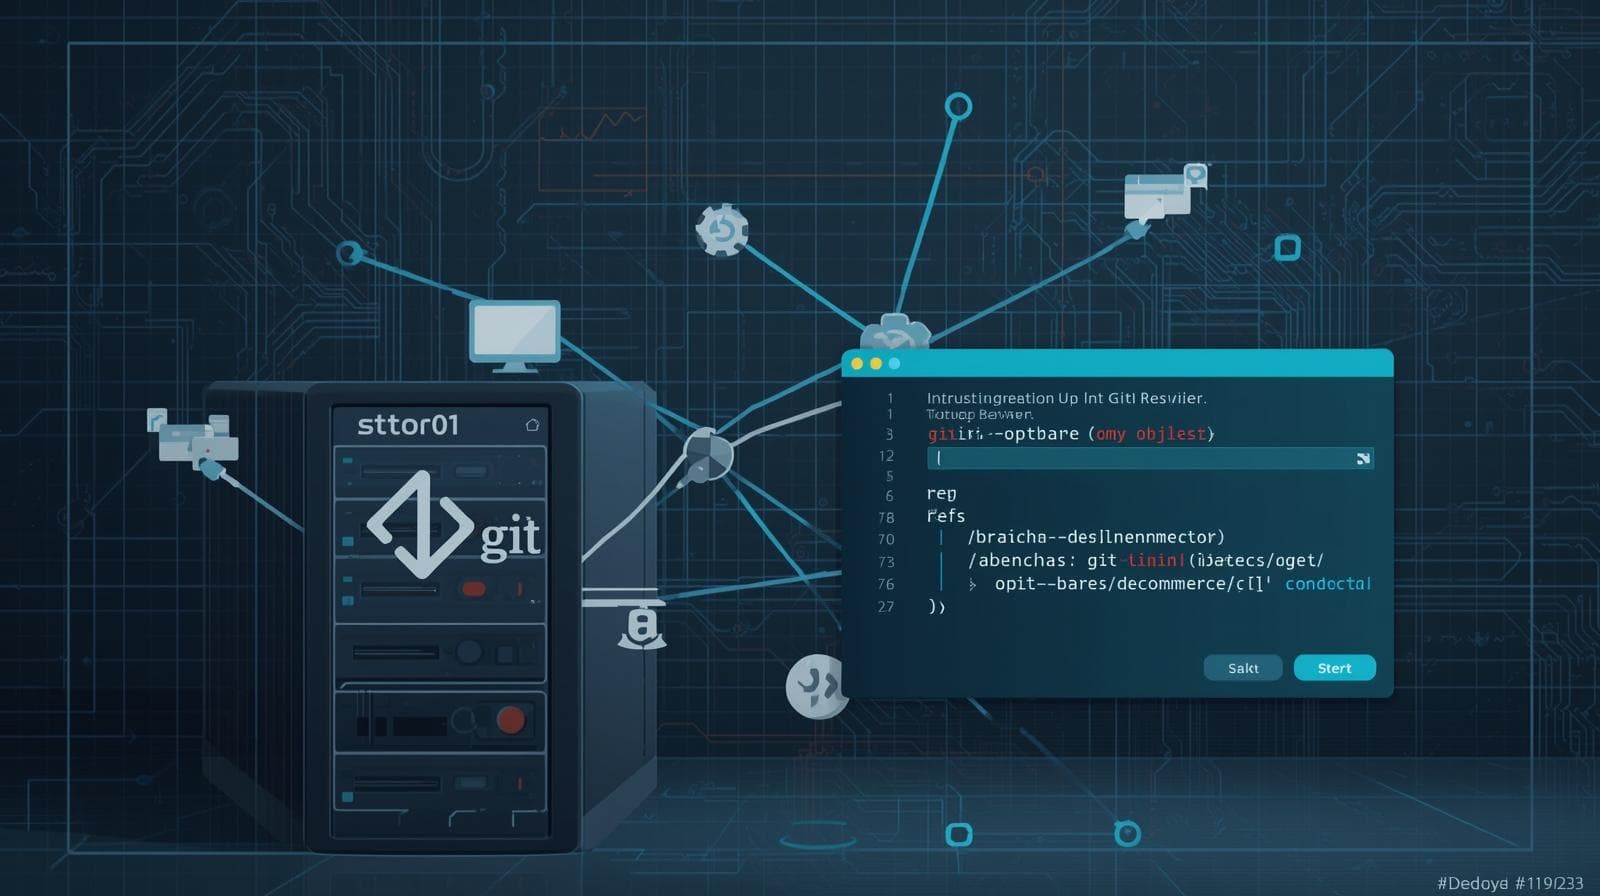
Welcome back! 👋 Day 21 of the 100 Days Cloud DevOps Challenge, and today we're establishing the foundation of version control - creating a Git bare repository on a central server! This is the first step in setting up collaborative development infrastructure. Let's build it! 🎯
🎯 The Mission - Central Git Repository Setup
It's Friday morning, and the development team needs a Git repository for their new project:
📋 TASK TICKET #DEV-6012 - Git Repository Setup
Priority: HIGH
Type: Version Control Infrastructure

━━━━━━━━━━━━━━━━━━━━━━━━━━━━━━━━━━━━━━━━━━━━━━━━
PROJECT: Ecommerce Application Development
Target: Storage Server (ststor01)
━━━━━━━━━━━━━━━━━━━━━━━━━━━━━━━━━━━━━━━━━━━━━━━━

REQUIREMENTS:

1. Package Installation:
   └─ Install Git using yum package manager
   └─ Target: Storage Server

2. Repository Creation:
   └─ Create bare Git repository
   └─ Location: /opt/ecommerce.git
   └─ Type: Bare repository (no working directory)
   └─ CRITICAL: Use exact name "ecommerce.git"

3. Purpose:
   └─ Central repository for team collaboration
   └─ Developers will clone from this location
   └─ All code changes pushed here

━━━━━━━━━━━━━━━━━━━━━━━━━━━━━━━━━━━━━━━━━━━━━━━━
STATUS: READY TO START
DEADLINE: Today
━━━━━━━━━━━━━━━━━━━━━━━━━━━━━━━━━━━━━━━━━━━━━━━━
This is the foundation of collaborative development! Every GitHub, GitLab, and Bitbucket server uses bare repositories to store code centrally! 🏗️
🤔 Why This Matters - Understanding Git Architecture
The Problem: Multiple Developers, One Codebase
Without Version Control:
Developer 1: working on feature A (local machine)
Developer 2: working on feature B (local machine)
Developer 3: fixing bug C (local machine)

Problems:
❌ How to combine all changes?
❌ What if changes conflict?
❌ How to track who changed what?
❌ How to revert bad changes?
❌ How to work on different features simultaneously?
With Git Repository:
        Central Repository (ststor01)
        /opt/ecommerce.git (bare)
               ↓
    ┌──────────┼──────────┐
    ↓          ↓          ↓
 Dev 1      Dev 2      Dev 3
 clone      clone      clone
   ↓          ↓          ↓
 Feature A  Feature B  Bug Fix C
   ↓          ↓          ↓
 push       push       push
   ↓          ↓          ↓
    └──────────┼──────────┘
               ↓
        Central Repository
        (all changes merged)

Benefits:
✅ All code in one place
✅ Complete change history
✅ Conflict resolution
✅ Parallel development
✅ Easy rollback
✅ Code review workflow
Real stat: 96% of professional developers use Git for version control! It's the industry standard! 📊
Understanding Bare vs Normal Repositories
Normal Repository (For Development):
my-project/
├─ .git/                ← Git database (hidden)
│  ├─ objects/
│  ├─ refs/
│  ├─ config
│  └─ HEAD
├─ index.html           ← Working files
├─ style.css
└─ app.js

Purpose: Local development
Can: Commit changes directly
Has: Working directory + Git database
Bare Repository (For Central Server - What We're Creating):
ecommerce.git/
├─ objects/             ← Git database (exposed)
├─ refs/
├─ config
├─ HEAD
└─ hooks/

Purpose: Central sharing point
Can: Receive pushes, serve clones
Has: Only Git database, NO working directory
Why bare repositories for servers?
✅ No working directory - Can't accidentally modify files
✅ Accepts pushes - Normal repos reject pushes by default
✅ Pure storage - Only stores version history
✅ Convention - Everyone knows it's for sharing (
.gitextension)✅ Efficient - No disk space wasted on working files
Think of it like this:
Normal repo = Your personal workspace (office desk)
Bare repo = Shared filing cabinet (storage server)
Real-World Git Architecture
How companies use Git:
┌─────────────────────────────────────────────┐
│     GitHub/GitLab/Bitbucket Server          │
│     (Thousands of bare repositories)        │
│     ├─ company/frontend.git (bare)          │
│     ├─ company/backend.git (bare)           │
│     └─ company/mobile.git (bare)            │
└─────────────────────────────────────────────┘
        ↓ clone/push         ↓ clone/push
┌─────────────────┐   ┌─────────────────┐
│   Developer 1   │   │   Developer 2   │
│   (Normal repo) │   │   (Normal repo) │
│   Work locally  │   │   Work locally  │
└─────────────────┘   └─────────────────┘
Our setup is the same principle:
Storage Server (ststor01)
└─ /opt/ecommerce.git (bare) ← What we're creating!
           ↓
    Developer machines
    (clone from here)
🏗️ Understanding the Infrastructure
What We're Building:
┌─────────────────────────────────────────────────┐
│      Storage Server (ststor01)                  │
│      natasha@172.16.238.15                      │
├─────────────────────────────────────────────────┤
│                                                 │
│  Before:                                        │
│  └─ /opt/ (empty)                               │
│                                                 │
│  After our setup:                               │
│  └─ /opt/ecommerce.git/ (bare repository)      │
│     ├─ HEAD                                     │
│     ├─ config (bare = true)                     │
│     ├─ description                              │
│     ├─ hooks/                                   │
│     ├─ info/                                    │
│     ├─ objects/                                 │
│     └─ refs/                                    │
│        ├─ heads/                                │
│        └─ tags/                                 │
│                                                 │
│  Developers will access via:                    │
│  git clone natasha@ststor01:/opt/ecommerce.git  │
│                                                 │
└─────────────────────────────────────────────────┘
How developers will use it:
Step 1: Clone repository
Developer machine:
$ git clone natasha@ststor01:/opt/ecommerce.git
$ cd ecommerce

Step 2: Make changes
$ echo "# Ecommerce App" > README.md
$ git add README.md
$ git commit -m "Initial commit"

Step 3: Push to server
$ git push origin main

Step 4: Other developers pull
Developer 2:
$ git clone natasha@ststor01:/opt/ecommerce.git
$ # Gets all changes!
🛠️ Phase 1: Access Storage Server
Step 1.1: SSH to Storage Server
# From Jump Host, connect to Storage Server
ssh natasha@ststor01
# Password: Bl@kW (or check your lab credentials)
You're now logged in as natasha on the Storage Server! ✅
Step 1.2: Switch to Root User
# Become root to install packages
sudo su -
You're now root! Ready to install Git! ✅
🛠️ Phase 2: Install Git
Step 2.1: Install Git Package
# Install Git using yum
yum install -y git
Output:
Loaded plugins: fastestmirror, ovl
Loading mirror speeds from cached hostfile
Resolving Dependencies
--> Running transaction check
---> Package git.x86_64 0:2.x.x will be installed
...
Installed:
  git.x86_64 0:2.x.x

Complete!
Git installed successfully! 🎉
Step 2.2: Verify Git Installation
# Check Git is installed
git --version
Expected output:
git version 2.39.3
Or similar version number - confirms Git is working! ✅
Check Git location:
which git
Output: /usr/bin/git
Git is ready to use! ✅
🛠️ Phase 3: Create Bare Repository
Step 3.1: Create Bare Repository
# Create bare Git repository at /opt/ecommerce.git
git init --bare /opt/ecommerce.git
Expected output:
Initialized empty Git repository in /opt/ecommerce.git/
Repository created! 🎊
What just happened:
git init= Initialize a Git repository--bare= Create bare repository (no working directory)/opt/ecommerce.git= Location and name (EXACT as specified!)
Step 3.2: Verify Repository Was Created
# List directory contents
ls -la /opt/ecommerce.git/
Expected output:
total 16
drwxr-xr-x. 7 root root  119 Nov 26 10:00 .
drwxr-xr-x. 3 root root   28 Nov 26 10:00 ..
drwxr-xr-x. 2 root root    6 Nov 26 10:00 branches
-rw-r--r--. 1 root root   66 Nov 26 10:00 config
-rw-r--r--. 1 root root   73 Nov 26 10:00 description
-rw-r--r--. 1 root root   23 Nov 26 10:00 HEAD
drwxr-xr-x. 2 root root 4096 Nov 26 10:00 hooks
drwxr-xr-x. 2 root root   21 Nov 26 10:00 info
drwxr-xr-x. 4 root root   30 Nov 26 10:00 objects
drwxr-xr-x. 4 root root   31 Nov 26 10:00 refs
Perfect! These are the internals of a Git repository! ✅
Key directories:
objects/- Stores all Git data (commits, files, etc.)refs/- Stores branch and tag referenceshooks/- Scripts that run on Git eventsconfig- Repository configurationHEAD- Points to current branch
🛠️ Phase 4: Verify It's a Bare Repository
Step 4.1: Check Repository Configuration
# View repository config
cat /opt/ecommerce.git/config
Expected output:
[core]
        repositoryformatversion = 0
        filemode = true
        bare = true
Key line: bare = true ← This confirms it's a bare repository! ✅
Step 4.2: Verify Using Git Command
# Check if repository is bare
git -C /opt/ecommerce.git config --get core.bare
Output: true
Confirmed: It's a bare repository! ✅
Step 4.3: Check HEAD Reference
# See what HEAD points to
cat /opt/ecommerce.git/HEAD
Expected output:
ref: refs/heads/master
Or for newer Git versions:
ref: refs/heads/main
This is the default branch reference! ✅
Step 4.4: Check Repository Description
# View description file
cat /opt/ecommerce.git/description
Output:
Unnamed repository; edit this file 'description' to name the repository.
You can customize this:
echo "Ecommerce Application Central Repository" > /opt/ecommerce.git/description
🎉 Phase 5: Final Verification
Step 5.1: Complete Directory Check
# Check the repository location and permissions
ls -ld /opt/ecommerce.git
Expected output:
drwxr-xr-x. 7 root root 119 Nov 26 10:00 /opt/ecommerce.git
Permissions: drwxr-xr-x means:
d= directoryrwx= owner (root) can read/write/executer-x= group can read/executer-x= others can read/execute
Step 5.2: Verify Complete Structure
# Show tree structure (if tree is installed)
tree /opt/ecommerce.git

# Or use ls with recursive flag
ls -R /opt/ecommerce.git
Expected structure:
/opt/ecommerce.git
├── branches
├── config
├── description
├── HEAD
├── hooks
│   ├── applypatch-msg.sample
│   ├── commit-msg.sample
│   ├── fsmonitor-watchman.sample
│   ├── post-update.sample
│   ├── pre-applypatch.sample
│   ├── pre-commit.sample
│   ├── pre-merge-commit.sample
│   ├── pre-push.sample
│   ├── pre-rebase.sample
│   ├── pre-receive.sample
│   ├── prepare-commit-msg.sample
│   ├── push-to-checkout.sample
│   └── update.sample
├── info
│   └── exclude
├── objects
│   ├── info
│   └── pack
└── refs
    ├── heads
    └── tags
All components present! ✅
Step 5.3: Test Repository Accessibility
# Try cloning locally to verify it works
cd /tmp
git clone /opt/ecommerce.git test-clone
Expected output:
Cloning into 'test-clone'...
warning: You appear to have cloned an empty repository.
done.
Warning is normal! Repository is empty (no commits yet). ✅
Clean up test:
rm -rf /tmp/test-clone
REPOSITORY SETUP COMPLETE! 🎉🎊🎈
🔍 Understanding What We Built
Repository Anatomy
Let's understand each component:
/opt/ecommerce.git/
│
├─ HEAD
│  └─ Points to current branch (refs/heads/master or main)
│
├─ config
│  └─ Repository settings (bare = true)
│
├─ description
│  └─ Repository description (for GitWeb UI)
│
├─ hooks/
│  └─ Scripts triggered by Git events:
│     ├─ pre-commit (runs before commit)
│     ├─ post-receive (runs after push)
│     └─ ... (many others)
│
├─ info/
│  └─ exclude (like .gitignore but not versioned)
│
├─ objects/
│  └─ Git object database:
│     ├─ Commits (version snapshots)
│     ├─ Trees (directory structures)
│     ├─ Blobs (file contents)
│     └─ Tags (named references)
│
└─ refs/
   ├─ heads/ (branches)
   │  └─ master or main (when first commit made)
   └─ tags/ (version tags)
      └─ v1.0.0 (example)
How Git Stores Data
When developers make commits:
Developer commits:
$ git add file.txt
$ git commit -m "Add feature"

What happens in /opt/ecommerce.git/:
├─ objects/
│  ├─ a1b2c3... (commit object)
│  ├─ d4e5f6... (tree object - directory structure)
│  └─ g7h8i9... (blob object - file.txt content)
│
└─ refs/heads/main
   └─ Points to: a1b2c3... (latest commit)
Every file, every version, is stored as an object!
Why .git Extension?
Convention for bare repositories:
project.git= Bare repository (server)project/= Normal repository (development)
Real-world examples:
GitHub:
https://github.com/user/repo.gitGitLab:
git@gitlab.com:user/repo.gitOur server:
natasha@ststor01:/opt/ecommerce.git
The .git immediately tells developers: "This is a bare repository for cloning!"
💡 Key Takeaways
✨ Bare repositories are for central storage, not direct development
✨ Git installation is simple with yum install git
✨ git init --bare creates a bare repository
✨ Exact naming matters - /opt/ecommerce.git not /opt/ecommerce
✨ bare = true in config confirms repository type
✨ No working directory - only Git database files
✨ .git extension is convention for bare repositories
✨ Server-side repos enable team collaboration
✨ Objects directory stores all version history
✨ Refs directory stores branch and tag pointers
✨ Hooks directory allows automated workflows
🎓 Interview Questions
Q1: What's the difference between a normal Git repository and a bare repository? When would you use each?
Answer: A normal repository contains both a working directory (your actual files) and a .git directory (version history). You can edit files, commit changes, and view different versions. A bare repository only contains the .git directory contents - no working files. Key differences: Normal repos are for development (local machines), bare repos are for sharing (servers). Normal repos reject pushes by default to prevent conflicts with working directory. Bare repos accept pushes safely since there's no working directory to conflict with. Use normal repos for: Local development, feature branches, personal projects. Use bare repos for: Central servers (like GitHub), team collaboration hubs, backup repositories. Convention: Bare repos use .git extension (project.git), normal repos don't (project/). Real example: Your laptop has a normal repo where you code. GitHub/GitLab servers have bare repos where you push. This separation prevents accidental modifications on the server and enables proper collaboration workflows.
Q2: Walk me through what happens when a developer clones your newly created bare repository and pushes their first commit.
Answer: Step-by-step flow: 1) Developer clones: git clone natasha@ststor01:/opt/ecommerce.git - Git creates local directory "ecommerce/", copies entire repository structure, sets up "origin" remote pointing to server, checks out default branch (creates working directory). 2) Developer makes changes: Creates files, edits code, stages with git add, commits with git commit -m "Initial commit". 3) Local commit: Git creates objects in local .git/objects/ - commit object (metadata + message), tree object (directory structure), blob objects (file contents). Updates local refs/heads/main to point to new commit. 4) Developer pushes: git push origin main - Local Git connects via SSH to server, sends new objects to /opt/ecommerce.git/objects/, updates /opt/ecommerce.git/refs/heads/main on server to point to new commit. 5) Server accepts: Bare repository receives objects, stores in objects/ directory using content-addressable storage (SHA-1 hashes), updates branch reference. 6) Other developers: Can now git pull and receive the changes, see complete history, continue development. First push is special: Creates the main/master branch on server (before push, refs/heads/ is empty!). All subsequent pushes just add new objects and update references.
Q3: How would you set up access control so multiple developers can push to the repository?
Answer: Several approaches for team access: Method 1: Unix Groups (Simple) - Create git group: groupadd git, add users: usermod -aG git developer1, change repo ownership: chown -R root:git /opt/ecommerce.git, set permissions: chmod -R 775 /opt/ecommerce.git, set SGID bit: find /opt/ecommerce.git -type d -exec chmod g+s {} \; (new files inherit group). Method 2: Git Config (Shared Repository) - git -C /opt/ecommerce.git config core.sharedRepository group - automatically sets correct permissions on new objects. Method 3: SSH Keys (Production Standard) - Each developer generates SSH key: ssh-keygen, adds public key to server's ~/.ssh/authorized_keys, repository accessible via: git clone git@server:/opt/ecommerce.git. Method 4: Gitolite/GitLab (Enterprise) - Install Gitolite for fine-grained access control, per-repository, per-branch permissions, centralized management. Best practice for production: Use SSH keys + tool like GitLab/Gitea, provides web interface, merge requests, CI/CD integration, access audit logs. Security considerations: Never use shared passwords, use SSH keys with passphrases, limit who can force push, enable branch protection for main/production branches, set up hooks for code review requirements.
Q4: Explain what Git hooks are and provide examples of how they could be used in this repository.
Answer: Git hooks are scripts that run automatically when certain Git events occur. Located in /opt/ecommerce.git/hooks/, they enable automated workflows and enforcement of policies. Server-side hooks (for bare repos): pre-receive - Runs before accepting pushed commits. Use cases: Reject commits without proper message format, enforce code review approval, check for security issues, validate commit author. Example: Reject if commit message doesn't have ticket number. update - Runs once per pushed branch. Use cases: Branch protection (prevent force push to main), enforce naming conventions, restrict who can push to protected branches. post-receive - Runs after push is accepted. Use cases: Send notification emails, trigger CI/CD pipeline, update documentation, deploy to staging. Example script: #!/bin/bash + curl -X POST https://ci-server/build. Client-side hooks (for normal repos): pre-commit - Before commit. Check code style, run tests, prevent debug code. commit-msg - Validate commit message format. pre-push - Before push. Run full test suite. Real-world example: Company enforces: pre-receive validates commits are signed, update prevents force push to main, post-receive triggers Jenkins build, notifies Slack channel. Setting up hooks: Create script in hooks/, make executable: chmod +x, test thoroughly (hooks failing blocks operations!). Important: Hooks don't transfer with clone/push - must be set up on each system (server hooks stay on server, client hooks must be distributed).
Q5: What would you do if the repository needs to be migrated to a different server?
Answer: Migration strategy for bare repositories: Method 1: Clone Method (Simplest) - On new server: git clone --bare /path/to/old/server/ecommerce.git /opt/ecommerce.git. This preserves: all commits, all branches, all tags, complete history. Advantages: Clean, simple, built-in Git functionality. Method 2: rsync Method (Exact Copy) - rsync -av /old/path/ecommerce.git /new/path/ecommerce.git. Preserves: everything including hooks, config, permissions. Use when: Custom hooks, specific permissions, configuration must be preserved. Method 3: Bundle Method (Offline Transfer) - Create bundle: git bundle create repo.bundle --all, transfer file to new server, extract: git clone repo.bundle ecommerce.git, convert to bare: git clone --bare ecommerce ecommerce.git. Use when: No direct network access between servers, need to transfer via USB/email. Post-migration steps: 1) Update remote URLs for all developers: git remote set-url origin new-server:/opt/ecommerce.git. 2) Verify all branches: git branch -a. 3) Verify all tags: git tag -l. 4) Test push/pull operations. 5) Set up hooks on new server. 6) Configure permissions. 7) Update CI/CD systems. 8) Update documentation. Zero-downtime migration: Run both servers temporarily, use post-receive hook to mirror pushes, switch developers gradually, retire old server when all migrated. Backup best practice: Before migration, create bundle backup: git bundle create backup.bundle --all - this is a complete, portable backup!
Q6: How does Git store data efficiently when multiple versions of large files exist?
Answer: Git uses several clever techniques: 1) Content-Addressable Storage - Files stored by SHA-1 hash of content, identical files = same hash = stored once only. Example: 10 branches with same README.md = 1 object. 2) Object Types - Blob objects: File contents, Tree objects: Directory structure, Commit objects: Metadata + pointers, Tag objects: Named references. 3) Delta Compression - New version of file stores only differences (delta) from previous version, significantly reduces space. Example: 1MB file, change 10 lines = stores ~1KB delta, not entire 1MB. 4) Packfiles - Git periodically packs objects into packfiles, applies compression algorithms, removes redundancy. Command: git gc (garbage collection). 5) Shallow Clones - Developers can clone with limited history: git clone --depth 1 gets only latest commit, saves bandwidth and space. Real-world efficiency: Linux kernel repository: 1M+ commits, 70K+ files, Full history: ~3GB, Most recent: ~200MB after compression. Why this matters for bare repos: Server stores complete history for all developers, efficient storage = lower costs, faster clones, smaller backups. Storage growth: Repository size grows sub-linearly with commits due to compression. Best practices: Run git gc periodically on server, use .gitignore for large binaries, consider Git LFS for large files (videos, assets), monitor repository size in dashboards.
🌟 Final Thoughts
You've successfully set up a central Git repository! This is the foundation that enables teams to collaborate on code effectively.
What you accomplished:
✅ Installed Git on server using yum
✅ Created bare repository at exact location
✅ Verified repository structure and configuration
✅ Understood bare vs normal repositories
✅ Prepared infrastructure for team development
Real-world impact: This exact setup is how companies manage code:
Startups: Self-hosted Git servers in early days
Enterprises: Internal GitLab/Bitbucket servers
Open source: Thousands of projects on GitHub
DevOps: Infrastructure as Code repositories
Next steps for the team: Developers can now:
Clone the repository
Create branches for features
Commit changes locally
Push to central repository
Collaborate with merge requests
Track complete project history
This is professional software development infrastructure! 💪
🚀 What's Next?
Day 21 complete! 🎉 You've established version control infrastructure!
Skills Mastered Today:
✅ Git installation on servers
✅ Bare repository creation
✅ Understanding Git architecture
✅ Repository verification techniques
✅ Version control best practices
Tomorrow, Day 22 awaits with new challenges! Keep building! 💪
Day: 21/100
Challenge: KodeKloud Cloud DevOps
Date: November 26, 2025
Topic: Git Bare Repository Setup on Storage Server
Have you set up Git servers? What version control workflows does your team use? Share your experiences! 🗂️


